< Prev. |
Next > |
SFTP
Connection ![]() AzuraCast
Backup
AzuraCast
Backup
Enter your dedicated IP in the browser’s address bar. If you haven't already set up an SSL connection, a warning message may be displayed that the connection is not secure or that you might open a dangerous website. Ignore all those messages and click on the links that allow you to continue navigating to that IP.
The AzuraCast
login page opens. When you first access the AzuraCast web interface at
http://<your_IP>, you will be asked to create a new administrator account by
providing a username, email, and password.
Fill in some fields for your first Station Profile, which you may change later. (By the way, you may start multiple stations, if you want.) The single most important and mandatory field is the station’s name.
I chose “Radio Spiritus” and the
software automatically made this public page for my listeners:
http://92.5.239.117/public/radio_spiritus. But you can choose another “Short
Name” than the default made by the system (which in my case is radio_spiritus).
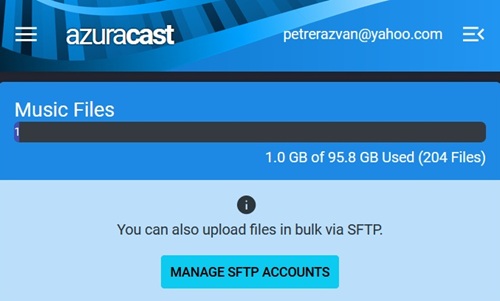
On the left side menu, go to Media > Music files and start uploading your songs via the web interface. It is better to put them into dedicated folders, so that you can keep track of them easily.
Then you can allocate a playlist for an entire folder, or choose the playlist(s) for each song.
The Playlists are the core of your radio station. Choose carefully the behaviour for each one. If a song is not included in any playlist, it will not be broadcast.
There are a few types of playlists. By default, it will be General Rotation, which means that:
You can check the order the songs were played from the left side menu, Reports > Song Playback Timeline.
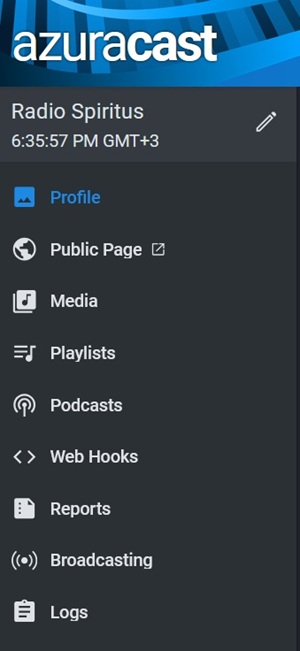
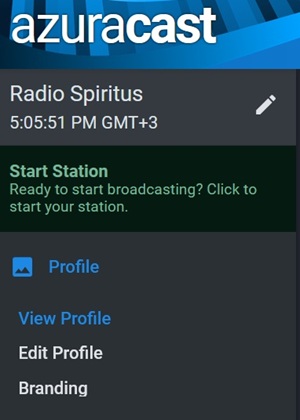
To make the radio station run, click on Start Station in the main left menu.
![]()
If you want to bulk upload audio files, you may use an FTP client like Filezilla, WinSCP, or CoreFTP. In the left menu, go to Media > Music Files, then click on ‘Manage SFTP Accounts’.
Click on ‘Add SFTP user’, choose a username and password.
Then open your FTP client and make a new connection with the following credentials:
You should be able to see only the files and folders you’ve created in the ‘Media’ directory and make file transfers between your PC and your AzuraCast server.
Tip: Upload the album art (image) for each song with Azuracast GUI, because the system gives each one a different name and links them to the song. It is useless to bulk upload your images since they cannot be referenced.
![]()
Go to Administration > System Maintenance > Backups
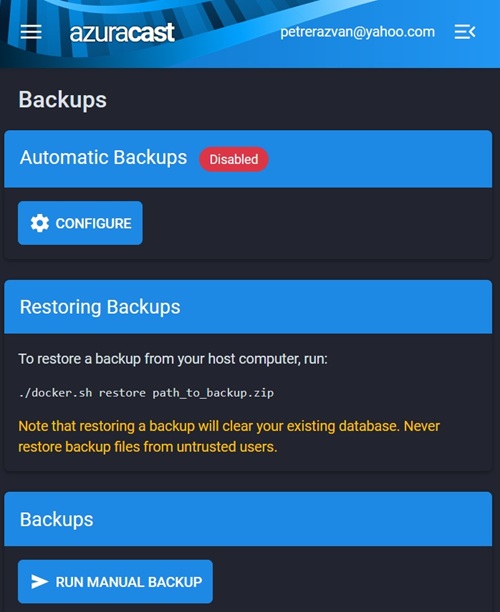
Click on “Run manual backup”.
Give the backup a name and an archive extension (I named it recovery_azuracast.zip, so I can easily open it in Windows).
You can download it and open it in Windows. This .zip file holds the Azuracast nested folders: var > azuracast > stations > radio_spiritus > media.
The ‘media’ folder contains the ‘.albumart’ and the other folders that you have created in AzuraCast GUI, with all the .mp3 files in there.
You can also read/write this ‘media’ folder by using the SFTP connection, which I’ve covered earlier in the ‘SFTP connection’ chapter.
Backing up your AzuraCast installation is strongly recommended before any update. If something goes wrong, you can restore the .zip file from the same directory that you saved it in, by running the commands:
With the ls /var/azuracast command, you will
not see the stations folder and its subfolders. It seems they are “invisible”.
Still, we can use the docker exec command to list everything we want. Example:
Explanation:
• drwxr-xr-x can be separated into four parts: d stands for
directory, rwx stands for read/write/executable permissions for the
user, and the last two parts r-x, r-x
say that the group and others cannot write.
When you SSH to the /var/azuracast directory, the only files that you will see there are
.env, azuracast.env, docker-compose.yml, docker.sh — not the whole Azuracast
installation. Think of it as a connection point. The actual files are stored in
a Docker-managed volume, which is a different location on your server's disk.
Similarly, when in Azuracast GUI, the default location for the backup
(/var/azuracast/backups) also refers to a hidden directory inside the Docker
installation.
To put it simply, the files are "technically" in a different location, managed by Docker, and the SFTP and SSH access points don't always give you a complete view of the underlying file structure.
Still, there is a Linux command to check the existence of the backup file (recovery_azuracast.zip, in my case) inside Docker:
Explanation:
sudo: Necessary because your user likely needs elevated privileges
to communicate with the Docker daemon. docker exec: The command to execute
a new command in a running container. azuracast: The name of the container
you want to run the command in. ls -lh: The command to list the contents of
a directory in a human-readable format. /var/azuracast/backups: The target
directory inside the container. If you want to remove this backup file to free up space in the Docker volume, you can:
- either use the Azuracast GUI (click the “delete” button)
- or use the Linux command:
Since we considered creating and attaching a Block volume as optional, the following operations are also optional and just for the intermediate or advanced users.
We'll use the Docker volume (/var/azuracast/backups) as a temporary staging area
and the block volume (/mnt/azuracast_backups) as the long-term, reliable storage
location. See also the chapter “Create and attach a Block volume”.
Log in to the Azuracast web interface and go to Administration > System Maintenance > Backups.
Run a manual backup. The recovery_azuracast.zip file will be created in the
/var/azuracast/backups Docker volume.
Check if the file is there:
/mnt/azuracast_backups folder
Use docker cp to copy the backup file from the container’s volume to the directory on your
host machine that is mounted to your block volume.
Or, if you are already in /mnt/recovery_azuracast folder:
To free up space on the Docker volume, you may delete the file from the container.
Now your backup is safely stored on your block volume, and ready for a reinstallation.
The
/var/azuracast/backups directory inside the container is now empty and ready for
the next backup you create.
![]()
Next chapter: Azuracast Re-installation >